
Easy Oral Motor Exercises to Try - Today!
Posted by Debra C. Lowsky, MS, CCC-SLP on 16th Oct 2012
Oral motor therapy works on the oral skills necessary for proper speech and feeding development. These skills include: awareness, strength, coordination, movement, and endurance of the lips, cheeks, tongue, and jaw. The activities below are an easy way to work on these skills. Incorporate them into your daily routine whenever you have time. Practice them on the way to school/work, during commercials, while you're making dinner, etc. Make it a game and have fun! Please note, however, that these oral motor exercises should not replace therapeutic intervention. It is best to see a speech-language pathologist and/or occupational therapist trained in oral motor therapy. They will be able to assess the situation, prescribe a course of action, and guide you through the process.
.
FOR AWARENESS:
• Use the Z-Vibe to normalize sensation within the oral cavity. Hyposensitive individuals have little to no awareness of what's going on inside their mouths. On the other hand, hypersensitive individuals are overly sensitive and often experience aversions to texture, temperature, taste, etc. Both cases can significantly affect speech and feeding development.
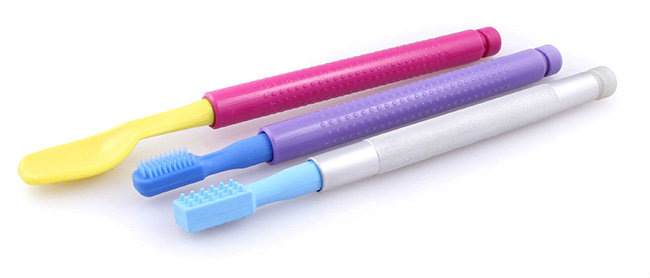
• The tip attachments for the Z-Vibe come in various shapes and textures. Use them to stroke and apply gentle pressure to the lips, cheeks (both inside and out), and the tongue. Vary the pressure, the direction of the strokes, and the length of the pressure. For hypersensitivities, introduce the Z-Vibe gradually.
• Gum massage is also a simple and effective way to provide oral stimulation.
.
FOR THE LIPS:
• Say "ooo" with exaggerated lip movement. Then say "eee." Combine them for "oo-ee." Really round the lips.
• Say "puh" and pop the sound with emphasis.
• Make a big smile. Relax and repeat.
• Puff out the cheeks while keeping the lips sealed. Relax and repeat. Puff out one cheek, then the other, then both. Then puff out the upper lip followed by the lower lip (or vice versa). Relax and repeat.
• Purse the lips to make a kiss. Slide the kiss to the right and then to the left or vice versa.
• Blow bubbles. You can also blow whistles, horns, kazoos, etc. Use these bubble straws to prevent kids from sucking up bubble solution when they blow.
• Drink through a straw rather than drinking from a cup. This is also a great activity for the tongue and cheeks. Drinking from a straw requires a lot of oral motor work: the cheeks tighten, the tongue tightens and retracts, and the lips purse. For tips on how to teach straw drinking, click here.
• In the above oral motor exercises, observe to see if the lips are symmetrical. If not, document what they look like and compare them to future practice sessions to monitor progress.
.
FOR THE TONGUE:
• Say "lalalalalalala" without moving the jaw up and down. Only move the tip of the tongue. Rest and repeat. If the jaw is moving doing this, have the child bite down on a Probe or Grabber to stabilize the jaw and isolate the tongue.
• Place the tongue tip on the alveolar ridge just behind the upper front teeth. Hold for as long as possible, working up to three minutes. Swallow when necessary, then get back into position.
• Practice tongue tip sounds. Say "t-t-t-t-t-t," "n-n-n-n-n-n," and "d-d-d-d-d-d." You can also try a combination of these sounds, such at "t-d-n."
• Place the tongue tip on the alveolar ridge behind the upper front teeth. Then place it behind the bottom front teeth. Repeat several times.
• Say "go" with exaggeration.
• Do a tongue pop. Suck the tongue up onto the roof of the palate and then pop it. Work up to 25 in a row.
• Place the tongue on the roof of the mouth. Hold it there with suction for about 5-10 seconds. Once that becomes easy, add another step: move the jaw up and down while keeping the tongue on the roof of the mouth.
• Rub a lollipop onto the lips and have the individual lick the taste off. Use the Popette Tip to add vibration to this exercise. You can also use peanut butter, frosting, applesauce, etc. (anything that will stick to the lips).
• Hold the tongue in mid-air (not resting on the lips or teeth). Tighten and relax the tongue. Tighten and relax.
• If necessary, use the Probe or Z-Vibe to pinpoint where the tongue needs to go for these oral motor exercises.
.
FOR THE CHEEKS:
• Use straws again!
• Put a proPreefer in the cheek area. Tighten the cheek around it. Relax and repeat.
• Put the lips together and contract the cheeks.
• Make an "o" with the lips. Then move the lips in a circle. Repeat several times and then reverse the direction.
.
FOR THE JAW:
• Place a Bite-n-Chew Tip or the loop of a Grabber in between the front teeth. Bite and hold up to a count of 10. Release and repeat.
• Use the Probe, Bite-n-Chew Tip, Grabber, or Y-Chew to push down on the jaw while the individual pushes up for an isometric exercise.
• Turn the Y-Chew so that you're using the widest part of the handle, then place in between the molar area to one side. Bite and hold the Y-Chew in place. Then move the tongue tip up and down. This oral motor exercise forces the jaw to stabilize as the tongue moves.
.
FOR COORDINATION:
• Say "buttercup" 5 times in a row. Relax and repeat.
• You can also try saying "rocket ship" instead of "buttercup." Both words work the lips, the tip of the tongue, and the back of the tongue.
• Say "puh tuh kuh" three times. Start slowly and then increase the rate. Mix the order up. Try "tuh puh kuh," "kuh puh tuh," etc.
• Put the tongue in the corner of the lips and trace the perimeter of the lips. When you reach the starting point, go back the other way. Focus on stabilizing the jaw and completing the circle. Don't allow the jaw to move at all - the tongue must do the work.
.
FOR EVERYTHING:
• Use the Z-Vibe or Probe for additional tactile input and oral sensory stimulation. Sometimes it is not enough to say "put your tongue behind your upper front teeth" or even to demonstrate how to do it on yourself. With the Z-Vibe or Probe, you can safely get in and around the oral cavity to show exactly what the lips, tongue, and cheeks need to do. This contact is called a tactile cue. The Z-Vibe can also be turned on to vibrate, which can increase focus and draw attention to specific parts of the mouth.
• Use a sticky incentive. Place peanut butter, frosting, etc. on the roof of the mouth and have the individual lick it off. Put it on the lips. Inside the cheek area. Put it on the Probe. Lots of room for creativity on this one.
• Use a mirror. Look in the mirror and instruct the individual to copy you. Make it a fun game of "Simon Says." Mirrors are great for visual feedback as long as they aren't distracting. I have some kids who will just play and make funny faces in the mirror!
.
The repetitions above are only suggestions, as this will vary from person to person depending on their abilities. If you only get one rep, that's okay! Make a note of the progress, and try to do more in the next practice session.
LOTS more exercises for oral motor and feeding therapy can be found in the rest of this blog and in my book, Tips & Techniques for the Z-Vibe. It covers a range of oral motor skills, including lip movement, jaw grading and stability, tongue and jaw dissociation, tongue elevation, tongue lateralization, tongue bowl, feeding, biting and chewing, and much more.
.
I hope you find this information useful!
.
All my best,
Debbie
Debra C. Lowsky, MS, CCC-SLP
.